Happy Halloween!

Halloween Pumpkin

Since it’s Halloween tomorrow, we thought we would do a pumpkin-related blog post. We’ve found a couple of great recipes to get rid of all those leftovers, so we hope you enjoy! x
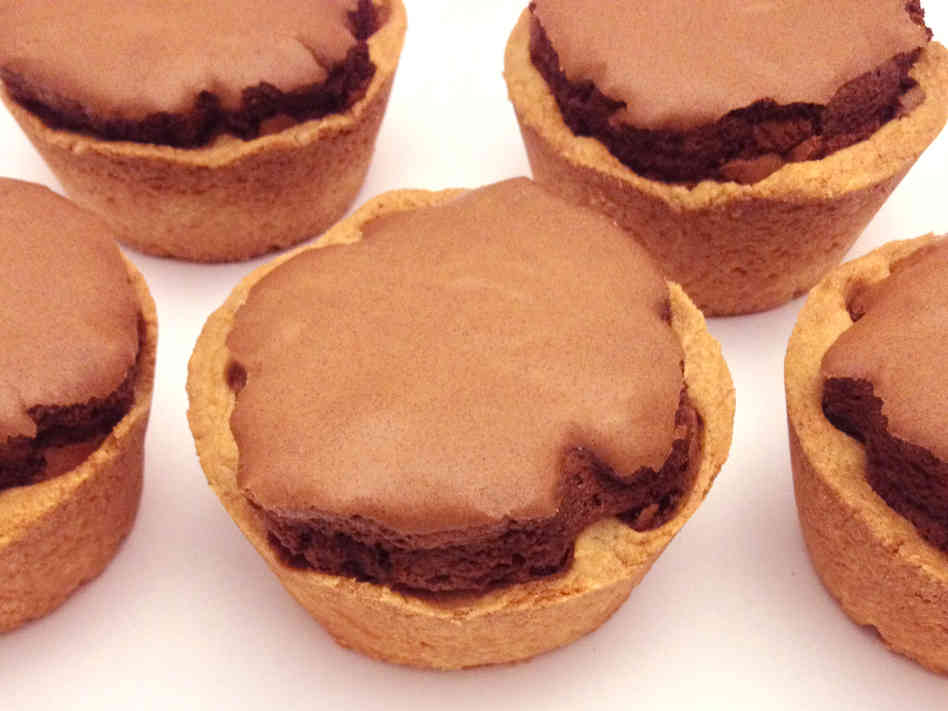
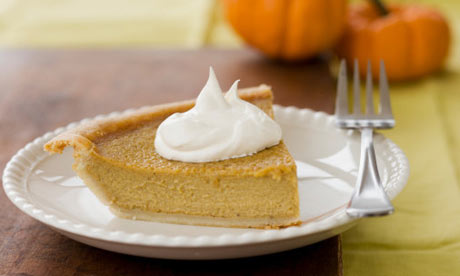
Pumpkin Pie

Pumpkin-pie-002

For the pastry
  • Sweet short crust pastry case (or, if you feel confident, make your own)
For the filling
  • 450 g prepared weight pumpkin flesh, cut into 1in/2.5 cm chunks
  • 2 large eggs plus 1 yolk
  • 75g soft dark brown sugar
  • 1 tsp ground cinnamon
  • ½ level teaspoon freshly grated nutmeg
  • ½ tsp ground allspice
  • ½ tsp ground cloves
  • ½ tsp ground ginger
  • 275 ml double cream

Method

  1. Pre-heat the oven to 180C/350F/Gas 4.
  2. Use a shop bought sweet crust pastry case, about 9 inch/23 cm diameter and 1½ inches/4 cm deep.
  3. To make the filling, steam the pumpkin then place in a coarse sieve and press lightly to extract any excess water.
  4. Then, lightly whisk the eggs and extra yolk together in a large bowl.
  5. Place the sugar, spices and the cream in a pan, bring to simmering point, giving it a whisk to mix everything together. Pour it over the eggs and whisk it again briefly.
  6. Now add the pumpkin pureé, still whisking to combine everything thoroughly.
  7. Pour the filling into your pastry case and bake for 35-40 minutes, by which time it will puff up round the edges but still feel slightly wobbly in the centre.
  8. Remove the pie from the oven and place the tin on a wire cooling rack. Serve chilled (store loosely covered in foil in the fridge) with créme fraïche.
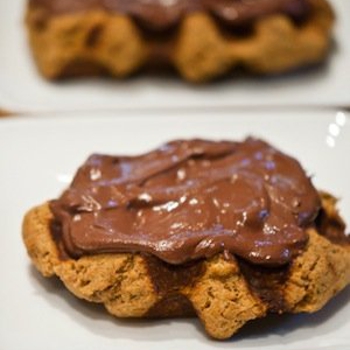
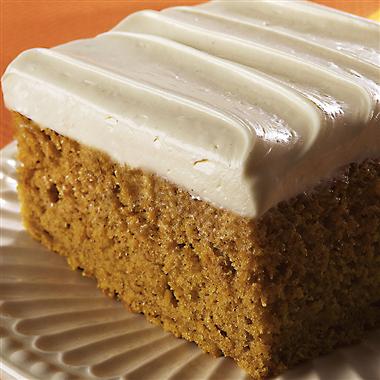
Pumpkin Cake

Spiced_Pumpkin_Cake_ashx(1)

Ingredients

For the cake

  • 300g self-raising flour
  • 300g light muscovado sugar
  • 3 tsp mixed spice
  • 2 tsp bicarbonate of soda
  • 175g sultanas
  • ½ tsp salt
  • 4 eggs, beaten
  • 200g butter, melted
  • zest 1 orange
  • 1 tbsp orange juice
  • 500g (peeled weight) pumpkin or butternut squash flesh, grated

For drenching and frosting

  • 200g pack soft cheese
  • 85g butter, softened
  • 100g icing sugar, sifted
  • zest 1 orange and juice of half

Method

  1. Heat oven to 180C/350F/Gas 4. Butter and line a 30 x 20cm baking tin.
  2. Put the flour, sugar, spice, bicarbonate of soda, sultanas and salt into a large bowl and stir to combine.
  3. Beat the eggs into the melted butter, stir in the orange zest and juice. Mix with the dry ingredients until combined.
  4. Stir in the pumpkin andour the batter into the tin. Bake for 30 mins, or until golden and springy to the touch.
  5. To make the frosting, beat together the cheese, butter, icing sugar, orange zest and 1 tsp of the juice until smooth and creamy, then set aside in the fridge.
  6. When the cake is done, leave it in the tin for 5 minutes, before turning onto a cooling rack. Prick it all over with a skewer and drizzle with the rest of the orange juice while still warm. Leave to cool completely.
  7. Give the frosting a quick beat to loosen, then, using a palette knife, spread over the top of the cake.

Enjoy! x

Microwave Mug Cake

Sometimes we all need cake …like NOW but let’s face it we are not all Mary Berry so cheating with a microwave mug cake is perfect for all you mums out there. Kids will love it and this recipe is perfect for 2 to share.

Ingredients

  • Microwave mug cake
  • 4 tbsp self raising (SR) flour
  • 4 tbsp caster sugar
  • 2 tbsp cocoa powder
  • 1 medium egg
  • 3 tbsp milk
  • 3 tbsp vegetable
  • A few drops vanilla
  • 2 tbsp chocolate chips/nuts/raisins etc (optional)

Method

  1. Use the largest mug you have to avoid it overflowing in the microwave!
  2. Add the flour, sugar and cocoa powder to the mug and mix.
  3. Add the egg to the mixture. Mix in as much as you can but don’t worry if there’s still dry mix left.
  4. Add all the other ingredients apart from the chocolate chips etc (if you are adding) and mix until smooth. Add the chocolate chips and/or the nuts/raisins and mix well.
  5. Centre your mug in the middle of the microwave oven and cook on high for 4-5 mins, or until it has stopped rising and is firm to the touch.  Watch it rise as it cooks!

5-minute-mug-cake-4-with-soft-light4 (2)

Cronut Recipe

Croissant x Doughnut = Cronut

cronut_2575295b

The biggest craze in America just now is the cronut-a cross between a croissant and a doughnut. The New York bakery that created them has such a large demand for them that they sell out of their daily batch of 200 by 9.30am! People have even been buying them and re-selling them online for up to $40! Clearly everyone wants to try these little treats so we found a recipe online for you all to try. If you’re feeling confident, you can make up your own croissant dough, or you can cheat and buy it ready made from the supermarket! Remember to adjust the amount of ingredients depending on how much dough you have. This recipe gives enough filling for 10 cronuts. Let us know how you get on!

Ingredients

For the cronut

  • Croissant dough
  • 100g caster sugar
  • Zest of 1 lemon

For the glaze

  • Juice of 1 lemon
  • Icing sugar

For the filling

  • 300ml whole milk
  • 1 vanilla bean/2tsp vanilla extract
  • 4 large egg yolks
  • 2 tbsp plain flour
  • 50g caster sugar

Method

  1. First, make the lemon sugar. Rub the lemon zest and the 100g caster sugar together for a few minutes, cover and set aside.
  2. For the filling, place the milk into a pot and set over medium heat. Add your vanilla to the pot.
  3. Add the egg yolks, flour and 50g caster sugar into a bowl and whisk together until smooth.
  4. When the milk comes to the boil, pour the milk over the eggs, whisking to combine. Pour the custard mixture back into the pot and cook until thickened, whisking constantly.
  5. Pour the custard back into the bowl, cover with clingfilm and refrigerate until needed.
  6. For the glaze, add enough icing sugar to the lemon juice until you have a thick pipe-able mixture (similar to toothpaste). Press clingfilm onto the surface of the glaze, to prevent it crusting over and set aside until needed.
  7. Roll out your croissant dough to about 1cm thick. Using a 3 1/2-Inch cookie cutter, cut out 10 circle and then use a 1-Inch cutter cut out the hole in the middle.
  8. Allow the ‘doughnuts’ to prove at room temperature until the they puff up.
  9. When they have proved, pour vegetable oil into a thick bottomed pot until it is two thirds full, place over medium heat and bring to 170C/350F. When it reaches temperature, fry the ‘doughnuts’ two at a time, making sure you fry each one for a couple of minutes on each side, or until a deep golden brown.
  10. Using a metal slotted spoon, remove the ‘doughnuts’ from the pan and place onto a wire rack covered with kitchen paper.
  11. Once cooled enough to handle, roll the outside of the doughnuts in the lemon sugar and set aside to cool completely.
  12. Place the vanilla custard into a piping bag fitted with a filling tip (#230). Press the tip into each quarter of the cronuts and pipe in a small amount of the custard.
  13. For the decoration, place the glaze into another piping bag and snip off the end. Pipe a ring around the top of the cronuts.

Halloween Cupcakes

If you’ve been in a supermarket recently, you might have noticed Halloween stuff everywhere! Yep, it’s that time of year again. Here at Cake-Cetera, we’ve been thinking up great ideas for decorating Halloween cupcakes. We’ve included all the steps for each design, so they’re simple and easy to do. Enjoy everyone, and have a great Halloween!

Pumpkin Cupcakes

easy-pumpkin-cupcakes

These adorable little cupcakes are so easy to make, they’re perfect for kids to help out. Once your cupcakes are baked, simply colour your buttercream orange and spread it onto the cupcakes.

If you want to add in the grooves of the pumpkin, leave the buttercream to harden a little and use the back of a knife to make the indents. To finish them off, simply add a chocolate stick to the top.

If you want to sprinkle the top of yours with orange sugar like the larger ones above, all you have to do is mix together some caster sugar with your orange food colouring. You can put the sugar and colour together in a ziplock bag and press them together with your hands until the sugar is completely covered, or you can add them to a jar, seal the lid tight and shake until the colour has mixed through.

Mummy Cupcakes

cupcake07

These cupcakes are better for people who prefer some sugarpaste (ready to roll icing/fondant) on their cakes and are still so easy to do! They can be made with or without buttercream, depending on your preference.

Once you’ve baked your cupcakes, apply a thin layer of buttercream (jam or a simple sugar syrup can also be used). You can then go ahead and roll out your sugarpaste until it’s really thin (a few millimetres is all you need). You then cut out strips of the sugarpaste and layer them over the cupcake, easy peasy! To finish, all you have to do is pipe on a little coloured buttercream for the eyes and you’re done!

Ghost Cupcakes

Ghost-Cupcakes-11-600x600

These ghost cupcakes are a favourite with many people every year, and no wonder why, they’re so cute! There are a few different ways you can do them, it’s all just down to personal taste.

Once your cupcakes are baked, pipe a simple layer of buttercream on top. This is when the different methods come in. Here are the two most popular:

1. You can take your buttercream and pipe a small mound in the middle of the cupcake. Whilst leaving this to firm up, you can roll out your sugarpaste until it’s quite thin. Then, using a cutter the same width as your cupcake, cut out a circle of your sugarpaste and drape it over the buttercream in the centre. This ghost in this method will not be as tall or sturdy as the following two, but it is preferred by most people because it is the simplest method and because of the taste.

2. As opposed to making the ghost structure with buttercream, you can roll a piece of sugarpaste into the same shape and place it in the middle of your cupcakes. You then roll out the rest of your sugarpaste and cut it into a circle and drape it over, as above. This method gives you a ghost that is sturdier and can stand taller than the buttercream version. To finish, simply pipe two eyes onto each ghost.

Witch Cupcakes

FNM_100112-Reader-Cupcakes-Pumpkin-Patch-Haunted-Forest-Wicked-Witch-003_s4x3_lg

These cupcakes have to be my favourite! As someone who has grown up watching the Wizard of Oz about a thousand times, I love the reference to the Wicked Witch of the East (although where are the ruby slippers?!). To make the decoration for these cupcakes, all you have to do is make two legs and feet out of sugarpaste and then plonk an upside down cupcake on top! Piece of cake!

Witch’s Hat Cupcakes

witch_hat_cupcake_topper_sm

Continuing on with the witch theme…

Every Halloween, loads of people make cupcake toppers to look like a witch’s hat. Sometimes they work out great…sometimes not so much. This cupcake is an easy cheat to getting the hat right, and since it uses cupcake cases instead of sugarpaste, it’s a doddle!

witch_hat_cupcake_tutorial3

All you have to do is take a cupcake case, fold it in half and then fold it in half again until you have one quarter (image 1). Then, fold it in half again (image 2), a little piece of double sided tape will hold this together. Then, open up the case and place it on top of your iced cake. Then, to finish, take another case and quarter it. Cut of the point at the top, open it out (image 4), place it over the other case (image 5) and you’re done!

We hope you all have a great Halloween and let us know how you get on with your cupcakes! x

Happy Chocolate Cupcake Day!

Chocolate Cupcakes

Who doesn’t love a cupcake? Especially a chocolate cupcake! Since today is chocolate cupcake day, here at Cake-Cetera we’ve been looking up some yummy recipes for you all to use.

We’ve found a couple of recipes that are a little different to a basic chocolate cupcake, so we hope you enjoy them!

Chocolate Orange Cupcakes

First up, we have chocolate orange cupcakes. These cupcakes are made with the juice of an orange, giving a slight fruity taste to the sponge. The buttercream is made with both white and orange chocolate, as well as orange zest. To us, this means it’s technically one of your five a day!

chocolate_orange_69109_16x9

Ingredients

For the cupcakes
  • 120g plain flour
  • 140g caster sugar
  • 1 tsp baking powder
  • 40g unsalted butter
  • 50g dark chocolate, melted
  • 1 free-range egg
  • 125ml milk
  • 1 orange, juice only
  • 3 tbsp granulated sugar
For the white chocolate and orange buttercream
  • 125g unsalted butter, softened
  • 250g icing sugar
  • 2-3 tbsp milk
  • 50g white chocolate, melted
  • 1 orange, zest only
  • 100g orange chocolate

Method

  1. Preheat the oven to 170C/325F/Gas 3. Line a 12-hole muffin tin with paper cases.
  2. Mix the flour, sugar and baking powder together in a food processor. Add the butter and pulse until combined.
  3. Whisk the melted chocolate, egg and milk together in a jug.
  4. Stir the chocolate mixture into the flour mixture until just combined.
  5. Spoon the mixture into the cases and bake for 15-20 minutes, or until risen and golden-brown and a skewer inserted into the middle comes out clean. Remove from the oven and set aside to cool for 10 minutes.
  6. Meanwhile, mix the orange juice and granulated sugar together in a bowl. Carefully pour the orange juice mixture over the warm cakes and set aside to cool completely.
  7. For the white chocolate and orange buttercream, beat the butter until light and fluffy. Carefully stir in the icing sugar and continue to beat for five minutes. Beat in the milk, melted chocolate and orange zest.
  8. Decorate the cupcakes with the buttercream. Use a sharp knife to make chocolate shavings from the orange chocolate and use them to decorate the cupcakes.

Red Velvet Cupcakes

Up next is a cupcake that is extremely popular just now-red velvet. These chocolate cupcakes contain red food colouring which gives them a lovely colour that stays after baking. These cakes are very rich, so a cream cheese frosting is usually used as opposed to buttercream, yummy!

Untitled

(These cupcakes have been decorated using cake crumbs from the sponge)

Ingredients


For the cupcakes:

  • 60g unsalted butter, at room  temperature
  • 150g caster sugar
  • 1 egg
  • 10g cocoa powder
  • 20ml red food colouring
  • ½tsp vanilla extract
  • 120ml buttermilk
  • 150g plain flour
  • ½tsp salt
  • ½tsp bicarbonate of soda
  • 1½tsp white wine  vinegar

For the cream cheese  frosting:

  • 300g icing sugar, sifted
  • 50g unsalted butter, at room  temperature
  • 125g cream cheese,  cold

You’ll also  need:

  • 12-hole cupcake tray, lined with  large cupcake cases

Method

  1. Preheat the oven to  170°C/325°F/gas mark 3.
  2. Put the butter and the  sugar in a freestanding electric mixer with a paddle attachment (or use a handheld electric whisk) and beat on medium speed until light and fluffy and  well mixed. Turn the mixer up to high speed, slowly add the egg and beat until everything is incorporated.
  3. In a separate bowl, mix together the cocoa powder, red food colouring and vanilla extract to make a  thick, dark paste. Add to the butter mixture and mix thoroughly until evenly  combined and coloured (scrape any unmixed ingredients from the side of the bowl  with a rubber spatula).
  4. Turn the mixer down to slow speed, slowly pour in half of the buttermilk and beat until well mixed. Then add half the flour, and beat until everything is incorporated. Repeat this process until all the buttermilk and flour has been added. Scrape down the side of the bowl again.
  5. Turn the mixer up to high speed and beat until you have a smooth, even mixture.  Turn the mixer down to low speed and add the salt, bicarbonate of soda and  vinegar. Beat until well mixed, then turn up the speed again and beat for another couple of minutes.
  6. Spoon the mixture into  the paper cases until two-thirds full and bake in the preheated oven for 20–25 minutes, or until the sponge bounces back when touched. A skewer inserted in the centre should come out clean.
  7. Leave the cupcakes to cool slightly in the tray before turning out onto a wire cooling rack to cool completely.
  8. For the cream cheese frosting, beat the icing sugar and butter together in a freestanding  electric mixer with a paddle attachment (or use a handheld electric whisk) on medium-slow speed until the mixture comes together. Add the cream cheese in one go and beat until it is completely incorporated. Turn the mixer up to medium-high speed and continue beating until the frosting is light and  fluffy (at least 5 minutes). Do not overbeat, as it can quickly become runny.
  9. When the cupcakes are  cold, spoon over the cream cheese frosting on top.

We hope you enjoy

Duffin Recipe

Doughnut x Muffin = Duffin

untitled (6)

The biggest craze in the bakery world just now is the duffin-a cross between a doughnut and a muffin. After ‘Duffingate’, the scandal in the news where a small London bakery has went up against Starbucks (http://www.independent.co.uk/life-style/food-and-drink/news/huffin-and-puffin-over-a-duffin–the-doughnutmuffin-hybrid-raising-heat-between-starbucks-and-small-pastry-chain-8867192.html) everyone wants to know how to make these treats. While most recipes are American, with the measurements in cups and confusing ingredients we don’t have, we found one that is easy to make for all us UK bakers. Enjoy!

Ingredients

  • 300g self-raising flour
  • 85g caster sugar, plus 65g extra to coat
  • pinch of salt
  • 80ml vegetable oil
  • 1 large egg
  • 175ml buttermilk
  • 1tsp vanilla extract
  • 3tsp strawberry jam
  • 100g unsalted butter
  • 1tsp ground cinnamon

Method

  1. Preheat the oven to 180C/350F/Gas 4 and grease a 6-hole muffin tin.
  2. Sieve the flour into a medium bowl, then add the pinch of salt and the 85g caster sugar.
  3. In another bowl, combine the vegetable oil, egg, buttermilk and vanilla extract. Add to the dry ingredients and mix until they have just combined.
  4. Place a spoonful of the mixture in each muffin hole and make an indent in the centre of each one. Fill each indent with 1/2 tsp of strawberry jam. Cover the jam with the remaining duffin mixture and bake for 20 minutes.
  5. Once baked, remove from the oven and leave the tray on a wire rack to cool.
  6. While the duffins are cooling, melt the butter. Meanwhile, combine the extra 65g caster sugar and the ground cinnamon in a large bowl.
  7. When the muffins are cool enough to handle, brush each duffin with melted butter, then roll in the cinnamon sugar. Serve and enjoy!

Duffins, Townies, Muffles and Cronuts

The duffin and cronut are hitting the news this week so we thought we’d keep you in the loop with the latest crazy combinations!

1. Duffin – A cross between a doughnut and a muffin

untitled (6)

2. Townie – A cross between a tartlet and a brownie

1-445b5d24a3a747828c5e9810ad62fb6f8ed90fdb-s6-c30

3. Muffle – A cross between a muffin and a waffle

ad1fc00ecaadae9babddf8a7c8175a7a.image_large_square

4. Cronut – A cross between a croissant and a doughnut

cronut_2575295b

Covering A Cake

Using Sugarpaste

Covering a cake with sugarpaste/ready to roll icing/fondant can seem scary if you’ve never tried it but once you know how to do it, it isn’t as difficult as you’d think. In this post, I’ll explain each step to show you how to cover your very own cake, and give you little tips that I find useful.

For me, outside of cake school exams, I have never used marzipan on my cakes, I always use buttercream. If you want to use marzipan, however, here is a link to a helpful video to show you how it’s done: http://www.youtube.com/watch?v=7cPP-IulcKs. As mentioned at the end of this video, you can go on to cover your marzipan cake with sugarpaste. The method is the exact same as covering a buttercream cake.

Tools You Will Need

  • 1 freshly baked cake (I would recommend using a 6-8 inch cake if this is your first time using sugarpaste (the smaller the cake, the easier it is to cover)
  • Buttercream
  • 2 cake boards/drums, 1 the same size as your cake and 1 a few inches larger

Silver_Cake_Drum_Round__99725.1354738517.1280.1280

  • 1 serrated knife/cake leveller
  • 1 large palette knife
  • 1 icing scraper/dough cutter

$(KGrHqN,!mEFBO3mqS3wBRgSOdbKuQ~~60_35 pme-side-scraper-stanless-steel

  • 1 large rolling pin
  • 1 measuring tape/ruler
  • 2 cake smoothers

aa76cda710bafe8d87662f94767fff78

  • 1 sharp knife/pizza cutter
  • small pins
  • small cup of water and a brush

Method

  • Put your cool, freshly baked cake into the fridge to firm up. I usually leave mine in for a few hours, or overnight just to ensure it is firm enough.
  • Once it is firm, take it out of the fridge. Using your serrated knife or cake leveller, trim the top of the cake so that it is level. Turn the cake upside down and cut it either in half, or into three, depending on how much filling you want. Secure the trimmed side to your smaller cake board with a little buttercream. Place the smaller board, with the cake, onto the larger board (I put a thin, small non slip mat between them. This stops the smaller board moving around when you are icing it).
  • Add your filling to your cake, and give the outside of the cake a thin, even layer of buttercream with your palette knife. This is known as a ‘crumb coat’ because it basically seals in all the crumbs. Ensure that this is as smooth as possible, as any lumps will be seen through the sugarpaste. I use a sharp edged icing scraper around the sides and use my palette knife on top. You can also use a dough slicer. Put this back into the fridge until the buttercream is hard. I usually leave mine for a few hours and use the time to make decorations for the cake.
  • Once the buttercream is hard, take the cake out of the fridge. Measure the width of the top of the cake, and the height with your measuring tape/ruler. This lets you know how much sugarpaste you will need (for example, if you have an 8 inch cake that is 3 inches tall, you add together the 8 for the width, and 3 for each side, giving you 14 inches).
  • Brush a thin layer of water onto the top and sides of your cake. This ensures that the sugarpaste will stick to the buttercream. Make sure you don’t put too much though, as it can affect the sugarpaste.
  • Remove your sugarpaste from its packaging and knead it until it is soft and pliable. Lightly dust your work surface with icing sugar. Using a large rolling pin, roll the sugarpaste out (ensuring it doesn’t stick to your work surface) until it is roughly 3-5mm thick. Measure the sugarpaste and make sure you have enough to cover your cake (for the example above, you would make sure you have 14 inches width and height). It is always better to have too much than not enough.

untitled (4)

  • Once you have your sugarpaste to the correct thickness, roll it over your rolling pin and then drape it over your cake.

untitled (3)

  • Using one of your smoothers, smooth the top to ensure there are no air bubbles. Then, using your hands, gently smooth around the edge of the cake and down the sides. If there are any folds in the icing, gently open them out and smooth them with your hands. Once the folds are gone, use your smoothers (one on top of the cake and one around the sides). This means the sugarpaste will be smooth and it won’t have any fingerprints on it!
  • If there are any air bubbles, use a small pin to pierce them and then smooth them out again.
  • Using your sharp knife/pizza cutter, trim the edges where the sugarpaste meets the larger board. If you’re feeling more confident, you can balance the cake on top of something smaller and trim the edges that way. Once the sugarpaste has hardened a little, you can add decorations to it.

untitled (2)untitled

(These pictures show a polystyrene dummy as opposed to a cake, that’s why there is no larger board underneath

My Tips

  • Always turn your cake upside down once it has been trimmed and cut. This means the side that was touching the bottom of cake tin will be the top of your cake. This ensures it is always smooth and level.
  • Once your cake has been cut, secure the new bottom (the side you have trimmed) to your smaller cake board with a small amount of buttercream. This stops it sliding around.
  • When you place the smaller cake board on top of the larger cake board, put a thin non slip mat between them (small enough that it does not peek out the sides). This stops the smaller board moving around when you are icing it.
  • ALWAYS make sure your sugarpaste is at room temperature, and ALWAYS knead it before you use it. Sugarpaste can be very temperamental, especially when it comes to temperature. If it has not been kneaded enough, it will not be pliable enough and this can cause tearing and can lead to your cake looking like it has been covered in ‘elephant skin’.
  • Only take the sugarpaste out of its packaging when you are ready to use it. NEVER leave sugarpaste lying out uncovered as it hardens very quickly and then becomes useless. Always keep it sealed in a bag.
  • Make sure you have a measuring tape or ruler handy, to measure how much sugarpaste you need.
  • Always brush a small amount of water onto your buttercream just before you cover it. This ensures the sugarpaste will stick.
  • Don’t use any icing sugar when you are kneading your sugarpaste as it just dries it out.
  • When you are rolling out the sugarpaste, ensure there is always a very thin layer of icing sugar on your work surface to stop it sticking. Turn the sugarpaste around after every couple of rolls, this means there is less chance it will stick to your worktop.
  • Make sure you have a few small pins handy, in case you need to pop any air bubbles.
  • The most important thing is making sure you are using a type of sugarpaste you feel comfortable with. There are loads to choose from and no two cake decorators will agree on every type available. If you can, buy some small samples of different types of sugarpaste and see which best suits your needs. Make sure you note the colour, flavour and texture to see if it’s suitable for you.

Good luck if you are covering your first cake and let us know how you got on! x

No Bake Chocolate Cake

This recipe is for a treat that has many names-no bake chocolate cake, refrigerator/fridge cake,  biscuit cake, tiffin etc. No matter what you call it, it tastes good and that’s all that matters! This version contains maltesers, but it can be made without them, or even substituting something else in their place. Enjoy! x

DSC05204_4

Ingredients

  • 200g milk chocolate
  • 100g unsalted butter
  • 2 tbsp golden syrup
  • 125g digestive biscuits
  • 135g bag of Maltesers

For the topping:

  • 200g milk chocolate
  • 25g unsalted butter
  • 1 tsp golden syrup

Method

  1. Line a 20cm square baking tin with baking parchment.
  2. Place the chocolate, butter and syrup in a bowl set over a pan of simmering water. (Do not let the base of the bowl touch the water). Once almost melted, remove from the heat and gently stir until any tiny bits chocolate have melted. Allow to cool a little.
  3. Place the biscuits and 35g of the Maltesers in a freezer bag, seal and crush with a rolling pin. You want mainly crumbs but a few small chunks of biscuit is fine.
  4. Mix together the crushed biscuits and whole Maltesers with the melted chocolate and stir until everything is coated. Press into the prepared tin.
  5. For the topping, melt the chocolate, butter and syrup as before and spread over the biscuit base.
  6. Cover the tin with cling film or foil and refrigerate for 1-2 hours before cutting into squares and serving.

Whoopie Pies

Easy Chocolate Whoopie Pies

Whoopie pies are an American treat that is halfway between a cookie and a cake, they’re made up of two sandwiches held together with a filling such as buttercream, ganache or, in this case, marshmallow. Yummy! x

rear_whoopiepies01_608

Ingredients

  • 125g butter
  • 150g chocolate (minimum 70% cocoa solids)
  • 225g sugar
  • 3 free-range eggs
  • 1tsp vanilla extract
  • 250g plain flour
  • 30g cocoa powder
  • ½tsp baking powder
  • 18 marshmallows
  • icing sugar to dust

Method

  1. Preheat the oven to 180C/350F/Gas 4. Line a baking tray with greaseproof paper.
  2. Melt the butter and chocolate in a bowl set over a pan of simmering water. (Do not let the base of the bowl touch the water).
  3. Whisk the sugar, eggs and vanilla together in a separate bowl then fold in the chocolate mixture.
  4. Sift the flour, cocoa and baking powder together, then fold into the chocolate and egg mixture.
  5. Place the mixture into a piping bag and pipe onto the baking tray (the mixture should make 36 biscuits, depending on size). Bake in the oven for 6-8 minutes.
  6. Remove from the oven and set aside half of the biscuits on a cooling rack. Turn the remaining biscuits over and place a marshmallow on top of each. Return to the oven for 2-3 minutes, or until the marshmallows have softened.
  7. Remove from the oven and set aside on a cooling rack to cool slightly. Press the cooled biscuits on top.