Easy Peasy Mince Pies

Since it’s now December, here at Cake-Cetera we’re in full Christmas mode! But let’s face it, after a full day of working (especially with cake) the last thing you want to do is spend all night in the kitchen! We love this quick, easy peasy recipe for homemade mince pies and we hope you will too! Let us know how you get on if you fancy making these yourself, and enjoy!

recipe-image-legacy-id--901483_10

Ingredients

  • 225g cold butter (diced)
  • 350g plain flour
  • 100g golden caster sugar
  • 280g mincemeat
  • 1 egg
  • Icing sugar (to dust)

Method

  1. To make the pastry, rub the cold, diced butter into the flour. Then, mix in the golden caster sugar and a pinch of salt. Combine the pastry into a ball (don’t add any liquids) and knead it briefly. The dough will be fairly firm. You can use the dough immediately, or chill (wrapped in cling filmfor later.
  2. Preheat the oven to 200C/400F/Gas 6. Using two 12-hole patty tins, line with the pastry by pressing small walnut-sized balls of pastry into each hole (you should get about 18). Spoon the mincemeat equally into the pies.
  3. Take slightly smaller balls of pastry than before and pat them out between your hands to make round lids, big enough to cover the pies. Top the pies with their lids, pressing the edges gently together to seal – you don’t need to seal them with milk or egg as they will stick on their own. (The pies can be frozen at this point for up to 1 month).
  4. Beat your egg and brush the tops of the pies. Bake for 20 minutes until golden.
  5. Once baked, leave to cool in the tin for 5 minutes, then remove to a wire rack. To serve, lightly dust with icing sugar. They will keep for 3 to 4 days in an airtight container.

Simple No-Bake Cheesecake

Who doesn’t love a good cheesecake?! (If you don’t, you’re crazy) This recipe is so simple yet so delicious. It is for a no-bake cheesecake so all you have to do is mix some ingredients together then throw it in the fridge! It is a basic, plain cheesecake so feel free to add any flavourings or other tasty ingredients to it and let us know how you got on!

470_2687941

Ingredients

  • 300g plain digestive biscuits
  • 200g melted butter
  • 20g butter
  • 250g cream cheese
  • 175ml double cream
  • 80g icing sugar

Method

  1. Use the 20g butter to line the cake tin you are going to make your cheesecake in.
  2. Put all the biscuits into a food bag and crush the biscuits with the end of a rolling pin, or something similar, until the biscuits are crumbs.
  3. Meanwhile, melt the 200g butter.
  4. Put the crushed biscuits into a mixing bowl and add the melted butter. Stir the butter through the biscuit until you have a thick mixture.
  5. Put the crumb mixture into your cake tin and press down with the back of a spoon to form your base. Place in the refrigerator to set.
  6. Add cream cheese to a mixing bow, add the double cream and whisk until you have a thick, creamy mixture.
  7. Add the icing sugar into the bowl and stir well until you have a smooth, thick mixture.
  8. Take your cake tin base and spoon your mixture onto it, smoothing with as you go.
  9. Finish off by adding your toppings and place in the fridge to set (I leave mine overnight).

Tips

  • If you want to add any flavourings, fruit etc, add them to the mixture along with the icing sugar at stage 7.
  • The first time I made this cheesecake, I found the biscuit base too thick in comparison to the topping. If you don’t like too much biscuit in your cheesecake, I would recommend either cutting down the amount of biscuit base, or increasing the filling.

Let us know how you got on with this recipe and share with us any tips/other recipes you love!

Happy Halloween!

Halloween Pumpkin

Since it’s Halloween tomorrow, we thought we would do a pumpkin-related blog post. We’ve found a couple of great recipes to get rid of all those leftovers, so we hope you enjoy! x

Pumpkin Pie

Pumpkin-pie-002

For the pastry
  • Sweet short crust pastry case (or, if you feel confident, make your own)
For the filling
  • 450 g prepared weight pumpkin flesh, cut into 1in/2.5 cm chunks
  • 2 large eggs plus 1 yolk
  • 75g soft dark brown sugar
  • 1 tsp ground cinnamon
  • ½ level teaspoon freshly grated nutmeg
  • ½ tsp ground allspice
  • ½ tsp ground cloves
  • ½ tsp ground ginger
  • 275 ml double cream

Method

  1. Pre-heat the oven to 180C/350F/Gas 4.
  2. Use a shop bought sweet crust pastry case, about 9 inch/23 cm diameter and 1½ inches/4 cm deep.
  3. To make the filling, steam the pumpkin then place in a coarse sieve and press lightly to extract any excess water.
  4. Then, lightly whisk the eggs and extra yolk together in a large bowl.
  5. Place the sugar, spices and the cream in a pan, bring to simmering point, giving it a whisk to mix everything together. Pour it over the eggs and whisk it again briefly.
  6. Now add the pumpkin pureé, still whisking to combine everything thoroughly.
  7. Pour the filling into your pastry case and bake for 35-40 minutes, by which time it will puff up round the edges but still feel slightly wobbly in the centre.
  8. Remove the pie from the oven and place the tin on a wire cooling rack. Serve chilled (store loosely covered in foil in the fridge) with créme fraïche.

Pumpkin Cake

Spiced_Pumpkin_Cake_ashx(1)

Ingredients

For the cake

  • 300g self-raising flour
  • 300g light muscovado sugar
  • 3 tsp mixed spice
  • 2 tsp bicarbonate of soda
  • 175g sultanas
  • ½ tsp salt
  • 4 eggs, beaten
  • 200g butter, melted
  • zest 1 orange
  • 1 tbsp orange juice
  • 500g (peeled weight) pumpkin or butternut squash flesh, grated

For drenching and frosting

  • 200g pack soft cheese
  • 85g butter, softened
  • 100g icing sugar, sifted
  • zest 1 orange and juice of half

Method

  1. Heat oven to 180C/350F/Gas 4. Butter and line a 30 x 20cm baking tin.
  2. Put the flour, sugar, spice, bicarbonate of soda, sultanas and salt into a large bowl and stir to combine.
  3. Beat the eggs into the melted butter, stir in the orange zest and juice. Mix with the dry ingredients until combined.
  4. Stir in the pumpkin andour the batter into the tin. Bake for 30 mins, or until golden and springy to the touch.
  5. To make the frosting, beat together the cheese, butter, icing sugar, orange zest and 1 tsp of the juice until smooth and creamy, then set aside in the fridge.
  6. When the cake is done, leave it in the tin for 5 minutes, before turning onto a cooling rack. Prick it all over with a skewer and drizzle with the rest of the orange juice while still warm. Leave to cool completely.
  7. Give the frosting a quick beat to loosen, then, using a palette knife, spread over the top of the cake.

Enjoy! x

Happy Chocolate Cupcake Day!

Chocolate Cupcakes

Who doesn’t love a cupcake? Especially a chocolate cupcake! Since today is chocolate cupcake day, here at Cake-Cetera we’ve been looking up some yummy recipes for you all to use.

We’ve found a couple of recipes that are a little different to a basic chocolate cupcake, so we hope you enjoy them!

Chocolate Orange Cupcakes

First up, we have chocolate orange cupcakes. These cupcakes are made with the juice of an orange, giving a slight fruity taste to the sponge. The buttercream is made with both white and orange chocolate, as well as orange zest. To us, this means it’s technically one of your five a day!

chocolate_orange_69109_16x9

Ingredients

For the cupcakes
  • 120g plain flour
  • 140g caster sugar
  • 1 tsp baking powder
  • 40g unsalted butter
  • 50g dark chocolate, melted
  • 1 free-range egg
  • 125ml milk
  • 1 orange, juice only
  • 3 tbsp granulated sugar
For the white chocolate and orange buttercream
  • 125g unsalted butter, softened
  • 250g icing sugar
  • 2-3 tbsp milk
  • 50g white chocolate, melted
  • 1 orange, zest only
  • 100g orange chocolate

Method

  1. Preheat the oven to 170C/325F/Gas 3. Line a 12-hole muffin tin with paper cases.
  2. Mix the flour, sugar and baking powder together in a food processor. Add the butter and pulse until combined.
  3. Whisk the melted chocolate, egg and milk together in a jug.
  4. Stir the chocolate mixture into the flour mixture until just combined.
  5. Spoon the mixture into the cases and bake for 15-20 minutes, or until risen and golden-brown and a skewer inserted into the middle comes out clean. Remove from the oven and set aside to cool for 10 minutes.
  6. Meanwhile, mix the orange juice and granulated sugar together in a bowl. Carefully pour the orange juice mixture over the warm cakes and set aside to cool completely.
  7. For the white chocolate and orange buttercream, beat the butter until light and fluffy. Carefully stir in the icing sugar and continue to beat for five minutes. Beat in the milk, melted chocolate and orange zest.
  8. Decorate the cupcakes with the buttercream. Use a sharp knife to make chocolate shavings from the orange chocolate and use them to decorate the cupcakes.

Red Velvet Cupcakes

Up next is a cupcake that is extremely popular just now-red velvet. These chocolate cupcakes contain red food colouring which gives them a lovely colour that stays after baking. These cakes are very rich, so a cream cheese frosting is usually used as opposed to buttercream, yummy!

Untitled

(These cupcakes have been decorated using cake crumbs from the sponge)

Ingredients


For the cupcakes:

  • 60g unsalted butter, at room  temperature
  • 150g caster sugar
  • 1 egg
  • 10g cocoa powder
  • 20ml red food colouring
  • ½tsp vanilla extract
  • 120ml buttermilk
  • 150g plain flour
  • ½tsp salt
  • ½tsp bicarbonate of soda
  • 1½tsp white wine  vinegar

For the cream cheese  frosting:

  • 300g icing sugar, sifted
  • 50g unsalted butter, at room  temperature
  • 125g cream cheese,  cold

You’ll also  need:

  • 12-hole cupcake tray, lined with  large cupcake cases

Method

  1. Preheat the oven to  170°C/325°F/gas mark 3.
  2. Put the butter and the  sugar in a freestanding electric mixer with a paddle attachment (or use a handheld electric whisk) and beat on medium speed until light and fluffy and  well mixed. Turn the mixer up to high speed, slowly add the egg and beat until everything is incorporated.
  3. In a separate bowl, mix together the cocoa powder, red food colouring and vanilla extract to make a  thick, dark paste. Add to the butter mixture and mix thoroughly until evenly  combined and coloured (scrape any unmixed ingredients from the side of the bowl  with a rubber spatula).
  4. Turn the mixer down to slow speed, slowly pour in half of the buttermilk and beat until well mixed. Then add half the flour, and beat until everything is incorporated. Repeat this process until all the buttermilk and flour has been added. Scrape down the side of the bowl again.
  5. Turn the mixer up to high speed and beat until you have a smooth, even mixture.  Turn the mixer down to low speed and add the salt, bicarbonate of soda and  vinegar. Beat until well mixed, then turn up the speed again and beat for another couple of minutes.
  6. Spoon the mixture into  the paper cases until two-thirds full and bake in the preheated oven for 20–25 minutes, or until the sponge bounces back when touched. A skewer inserted in the centre should come out clean.
  7. Leave the cupcakes to cool slightly in the tray before turning out onto a wire cooling rack to cool completely.
  8. For the cream cheese frosting, beat the icing sugar and butter together in a freestanding  electric mixer with a paddle attachment (or use a handheld electric whisk) on medium-slow speed until the mixture comes together. Add the cream cheese in one go and beat until it is completely incorporated. Turn the mixer up to medium-high speed and continue beating until the frosting is light and  fluffy (at least 5 minutes). Do not overbeat, as it can quickly become runny.
  9. When the cupcakes are  cold, spoon over the cream cheese frosting on top.

We hope you enjoy

Duffin Recipe

Doughnut x Muffin = Duffin

untitled (6)

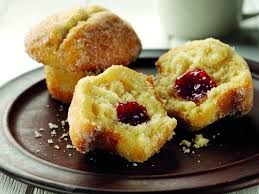
The biggest craze in the bakery world just now is the duffin-a cross between a doughnut and a muffin. After ‘Duffingate’, the scandal in the news where a small London bakery has went up against Starbucks (http://www.independent.co.uk/life-style/food-and-drink/news/huffin-and-puffin-over-a-duffin–the-doughnutmuffin-hybrid-raising-heat-between-starbucks-and-small-pastry-chain-8867192.html) everyone wants to know how to make these treats. While most recipes are American, with the measurements in cups and confusing ingredients we don’t have, we found one that is easy to make for all us UK bakers. Enjoy!

Ingredients

  • 300g self-raising flour
  • 85g caster sugar, plus 65g extra to coat
  • pinch of salt
  • 80ml vegetable oil
  • 1 large egg
  • 175ml buttermilk
  • 1tsp vanilla extract
  • 3tsp strawberry jam
  • 100g unsalted butter
  • 1tsp ground cinnamon

Method

  1. Preheat the oven to 180C/350F/Gas 4 and grease a 6-hole muffin tin.
  2. Sieve the flour into a medium bowl, then add the pinch of salt and the 85g caster sugar.
  3. In another bowl, combine the vegetable oil, egg, buttermilk and vanilla extract. Add to the dry ingredients and mix until they have just combined.
  4. Place a spoonful of the mixture in each muffin hole and make an indent in the centre of each one. Fill each indent with 1/2 tsp of strawberry jam. Cover the jam with the remaining duffin mixture and bake for 20 minutes.
  5. Once baked, remove from the oven and leave the tray on a wire rack to cool.
  6. While the duffins are cooling, melt the butter. Meanwhile, combine the extra 65g caster sugar and the ground cinnamon in a large bowl.
  7. When the muffins are cool enough to handle, brush each duffin with melted butter, then roll in the cinnamon sugar. Serve and enjoy!

No Bake Chocolate Cake

This recipe is for a treat that has many names-no bake chocolate cake, refrigerator/fridge cake,  biscuit cake, tiffin etc. No matter what you call it, it tastes good and that’s all that matters! This version contains maltesers, but it can be made without them, or even substituting something else in their place. Enjoy! x

DSC05204_4

Ingredients

  • 200g milk chocolate
  • 100g unsalted butter
  • 2 tbsp golden syrup
  • 125g digestive biscuits
  • 135g bag of Maltesers

For the topping:

  • 200g milk chocolate
  • 25g unsalted butter
  • 1 tsp golden syrup

Method

  1. Line a 20cm square baking tin with baking parchment.
  2. Place the chocolate, butter and syrup in a bowl set over a pan of simmering water. (Do not let the base of the bowl touch the water). Once almost melted, remove from the heat and gently stir until any tiny bits chocolate have melted. Allow to cool a little.
  3. Place the biscuits and 35g of the Maltesers in a freezer bag, seal and crush with a rolling pin. You want mainly crumbs but a few small chunks of biscuit is fine.
  4. Mix together the crushed biscuits and whole Maltesers with the melted chocolate and stir until everything is coated. Press into the prepared tin.
  5. For the topping, melt the chocolate, butter and syrup as before and spread over the biscuit base.
  6. Cover the tin with cling film or foil and refrigerate for 1-2 hours before cutting into squares and serving.

Yummy Treats For The Office

Improve The Office Day & Smile Day

Today is improve the office day, but it’s also smile day, so what better excuse(s) do you need to bake some treats for work? Here’s a couple of recipes that are simple, taste good and are easy to transport x

Flapjacks

Flapjack1

Ingredients

  • 175g butter
  • 175g golden syrup
  • 175g muscovado sugar
  • 350g porridge oats
  • ½ lemon, finely grated zest
  • pinch ground ginger

Method

  1. Preheat the oven to 150C/300F/Gas 2 and line a 20cm/8in square baking tin with baking paper.
  2. Melt the butter in a medium pan over a low heat. Dip a brush in the butter and brush the baking tin with a little bit of it.
  3. Add the golden syrup and sugar to the butter and heat gently. Once the sugar is dissolved and the butter is melted, remove the pan from the heat and stir in the porridge oats, lemon zest and ginger.
  4. Pack the mixture into the baking tin and squash down. Bake in the oven for 40 minutes.
  5. Once cooked, remove from the oven, leave to cool for 15 minutes, then turn out on to a chopping board and cut into squares.

Blueberry Muffins

Healthy-Breakfast1

Ingredients

  • 375g self-raising flour
  • 1tsp baking powder
  • 200g caster sugar
  • 125ml vegetable oil
  • 1 egg
  • 125ml milk
  • 1tsp vanilla extract
  • 300g blueberries, fresh or frozen
  • granulated sugar, for sprinkling

Method

1. Preheat oven to 180C/350F/Gas 4.

2. Place the flour, baking powder and sugar together. Sift together into a bowl.

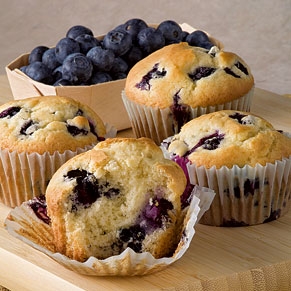
3. Place the oil, egg, milk and vanilla in a separate bowl and whisk to combine. Pour the liquid ingredients into the dry ingredients and mix until just combined. Add the blueberries and mix to combine.4. Spoon mixture into a 12-hole 125ml capacity muffin tin lined with paper cases. Sprinkle the tops with sugar and bake for 30–35 minutes or until cooked when tested with a skewer. Remove from tin and cool on a wire rack.
We hope you enjoy baking these little treats, and with oats and blueberries, they must be healthy!

Happy White Chocolate Day!

White Chocolate Day

White chocolate is something people seem to either love or hate. Hopefully you all love it and want to take advantage of these great recipes, they’re yummy! x

White Chocolate Brownies

macadamia-coconut-white-chocolate-blondies-18-600

(apparently these are also called ‘blondies’) 

Ingredients

  • 225g caster sugar
  • 4 free-range eggs
  • 225g melted butter, plus extra for greasing
  • 150g plain flour, sifted
  • 225g white chocolate, chopped
  • 100g macadamia nuts, chopped
Preparation method
  1. Preheat the oven to 180C/350F/Gas 4. Grease a 20cm/8in square cake tin with butter.
  2. For the blondie;, in a bowl, beat together the sugar and eggs until pale and fluffy. Beat in the melted butter a little at a time, making sure each addition of butter is fully incorporated before adding the next.
  3. Add the flour and carefully fold it into the mixture using a metal spoon.
  4. Add the chopped white chocolate and macadamia nuts and carefully fold them into the mixture.
  5. Spoon the blondie batter into the prepared cake tin and shake gently until level. Transfer the tin to the oven and bake for 30-35 minutes, or until a skewer inserted into the centre comes out clean. Set aside to cool.
  6. Once cooled, carefully remove the blondies from the tin, cut into squares and serve on a large serving plate.

White Chocolate & Raspberry Cookies

Raspberry-White-Chocolate-Cookies

Makes 18 cookies

Ingredients

225g softened butter

150g caster sugar

250g self raising flour

1 large eggs

100g white chocolate broken into pieces

50g chopped raspberries (I put my raspberries in the freezer for a little while first-it stops them adding too much moisture to the mix)

Method

  1. Pre-heat the oven to 180C/350F/Gas 4.
  2. Beat together the butter and sugar until soft.
  3. Beat in the egg  and a little of the flour.
  4. Mix in the rest of the flour.
  5. Fold in the chopped raspberries and chocolate.
  6. Shape cookies with floured hands, or use an ice cream scoop if you want them all the same size.
  7. Place on a non stick baking liner.
  8. Bake for 10 – 15 minutes or until golden.
  9. Leave to cool and firm up on the baking tray.

We hope you enjoy baking these yummy treats and let us know if you have any recipes you want to share!